
Every developer eventually faces the same question: "My app works on localhost — how do I actually put it on the internet?" Most guides online either give you a 5-minute Heroku walkthrough (not production-grade) or a 100-page DevOps textbook (overkill for a single VPS). Neither actually shows you what a real, battle-tested production deployment looks like.
I've deployed and managed multiple Node.js applications on VPS infrastructure in production — handling real traffic, real crashes, and real security threats. This guide shares the exact setup I use: from the initial server hardening to the PM2 ecosystem config, the Nginx configuration, SSL certificates, and the deployment script I run every time I push an update.
1. The Production Architecture
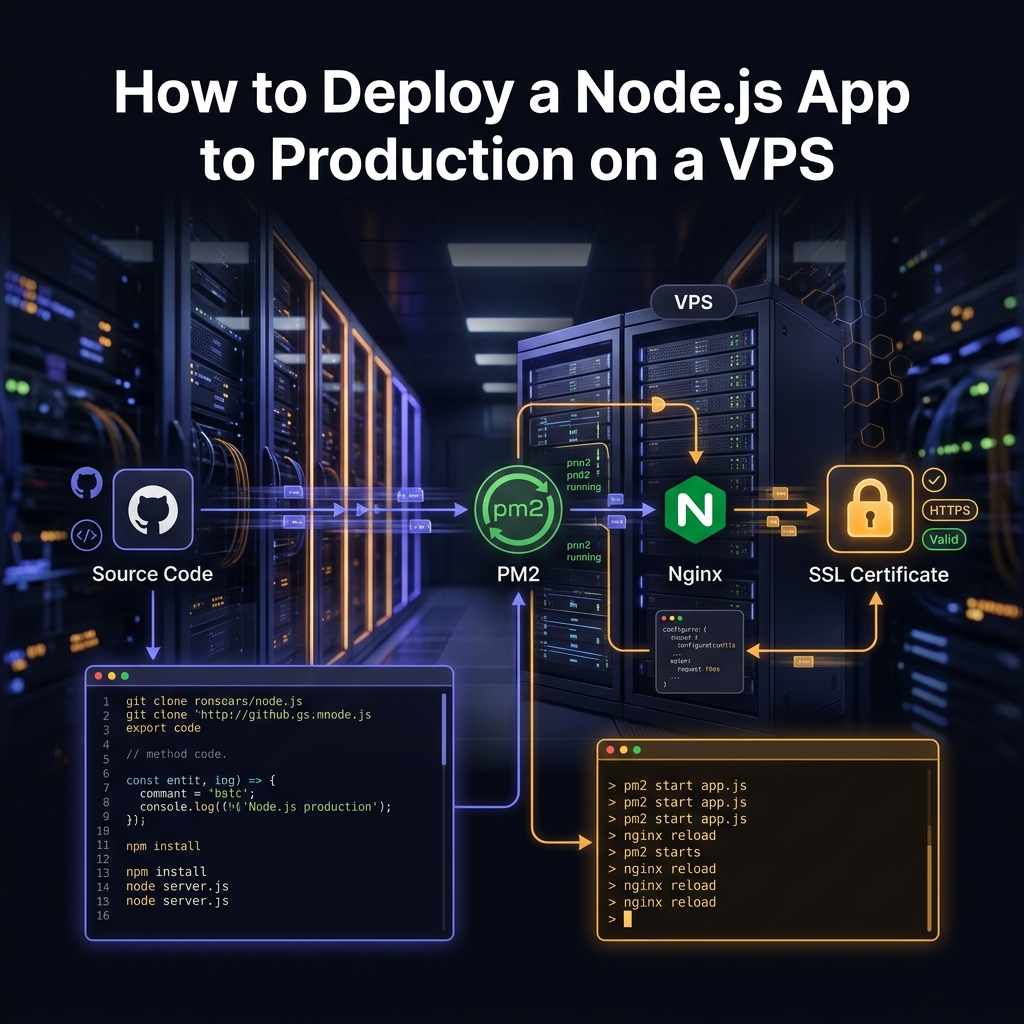
Before touching any commands, let me show you the architecture we're building. Understanding why each component exists prevents blind copy-pasting and helps you debug issues later.
(optional)"] CF -->|HTTPS| Nginx["Nginx
Reverse Proxy
:80 / :443"] subgraph VPS ["Ubuntu VPS"] Nginx -->|proxy_pass
http://127.0.0.1:3000| PM2["PM2 Process Manager"] PM2 --> W1["Worker 1
Node.js :3000"] PM2 --> W2["Worker 2
Node.js :3000"] PM2 --> W3["Worker 3
Node.js :3000"] PM2 --> W4["Worker N
Node.js :3000"] end Nginx -.->|Serves directly| Static["Static Files
CSS / JS / Images"] W1 --> DB[(MongoDB / PostgreSQL)]
Here's why each layer matters:
| Component | Role | Why You Need It |
|---|---|---|
| Nginx | Reverse proxy & SSL termination | Handles HTTPS, serves static files 10x faster than Node.js, buffers slow clients, provides rate limiting |
| PM2 | Process manager | Auto-restarts crashed processes, runs cluster mode across all CPU cores, manages logs, starts on boot |
| Let's Encrypt | Free SSL certificates | HTTPS is mandatory — browsers mark HTTP as "Not Secure", Google penalizes HTTP in rankings |
| UFW | Firewall | Blocks all ports except SSH/HTTP/HTTPS — your Node.js port (3000) is never exposed to the internet |
2. Initial Server Setup & Hardening
Start with a fresh Ubuntu 22.04 LTS or 24.04 LTS VPS. I recommend at least 2 GB RAM and 1 vCPU for a basic app, or 4 GB RAM / 2 vCPU if you're running a database on the same server.
Step 1: Connect via SSH
# Connect to your VPS as root (first time only)
ssh root@YOUR_SERVER_IP
Step 2: Create a Deploy User (Never Run Apps as Root)
# Create a new user called 'deploy'
adduser deploy

# Give it sudo privileges
usermod -aG sudo deploy

# Copy your SSH key so you can login as this user
rsync --archive --chown=deploy:deploy ~/.ssh /home/deploy

# Test the new user — open a NEW terminal and connect
ssh deploy@YOUR_SERVER_IP

# If it works, disable root SSH login for security
sudo sed -i 's/^PermitRootLogin yes/PermitRootLogin no/' /etc/ssh/sshd_config
sudo systemctl restart sshd
Step 3: Configure the Firewall
# Allow only the ports we need
sudo ufw allow OpenSSH        # Port 22 — SSH access
sudo ufw allow 'Nginx Full'   # Ports 80 & 443 — HTTP & HTTPS

# Enable the firewall
sudo ufw enable

# Verify — should show SSH and Nginx only
sudo ufw status

# Expected output:
# To                         Action      From
# --                         ------      ----
# OpenSSH                    ALLOW       Anywhere
# Nginx Full ALLOW AnywhereStep 4: System Updates & Essential Packages
# Update the system
sudo apt update && sudo apt upgrade -y

# Install essential build tools (needed for native npm modules)
sudo apt install -y build-essential git curl wget
3. Installing Node.js (The Right Way)
Do NOT install Node.js via sudo apt install nodejs — the default Ubuntu repository has severely outdated versions. Use the NodeSource repository to get the latest LTS version:
# Install Node.js 22.x LTS (current LTS as of 2026)
curl -fsSL https://deb.nodesource.com/setup_22.x | sudo -E bash -
sudo apt install -y nodejs

# Verify installation
node --version    # Should show v22.x.x
npm --version     # Should show 10.x.x

# Set npm to not use sudo for global installs
mkdir -p ~/.npm-global
npm config set prefix '~/.npm-global'
echo 'export PATH=~/.npm-global/bin:$PATH' >> ~/.bashrc
source ~/.bashrc
4. Deploying Your Application Code
Clone & Install
# Create a directory for your apps
sudo mkdir -p /var/www
sudo chown deploy:deploy /var/www

# Clone your repository
cd /var/www
git clone https://github.com/YOUR_USERNAME/YOUR_APP.git myapp
cd myapp

# Install ONLY production dependencies (no devDependencies)
npm ci --omit=devnpm ci instead of npm install? The ci command does a clean install from your package-lock.json — it's faster, deterministic, and guaranteed to match your development environment exactly. The --omit=dev flag skips installing development tools (testing libraries, linters) that have no business on a production server.
Set Up Environment Variables
# Create the production .env file
nano /var/www/myapp/.env
# Example .env for production
NODE_ENV=production
PORT=3000
DATABASE_URL=mongodb://localhost:27017/myapp
JWT_SECRET=your-long-random-secret-here
CORS_ORIGIN=https://yourdomain.com.env files to Git. Add .env to your .gitignore. For production secrets, consider using environment variables set directly in PM2's ecosystem config or a secrets manager.
Quick Test
# Test that your app starts without errors
node app.js   # or node server.js, node index.js — whatever your entry point is

# You should see: "Server running on port 3000" (or similar)
# Press Ctrl+C to stop it — we'll use PM2 from now on
5. PM2 — Production Process Management
Running node app.js directly in production is a critical mistake. If your app crashes (and it will eventually — an unhandled promise rejection, a database timeout, an out-of-memory error), the process dies and your site goes offline with no one to restart it. PM2 solves every one of these problems.
Install PM2
# Install PM2 globally
npm install -g pm2
Create the Ecosystem Config File
Instead of passing flags to the PM2 command every time, create a configuration file. This is the exact ecosystem.config.js pattern I use in production:
// /var/www/myapp/ecosystem.config.js

module.exports = {
  apps: [
    {
      name: 'myapp',                    // Name shown in PM2 process list
      script: './app.js',               // Your app's entry point
      cwd: '/var/www/myapp',            // Working directory

      // === CLUSTER MODE (use all CPU cores) ===
      instances: 'max',                 // Spawns one worker per CPU core
      exec_mode: 'cluster',            // Required for multi-instance

      // === ENVIRONMENT ===
      env: {
        NODE_ENV: 'production',
        PORT: 3000
      },

      // === RELIABILITY ===
      max_memory_restart: '512M',      // Auto-restart if memory exceeds 512MB
      restart_delay: 5000,             // Wait 5s before restarting a crashed process
      max_restarts: 10,                // Stop restarting after 10 consecutive crashes
      min_uptime: '10s',               // Process must run 10s to be considered "started"

      // === LOGGING ===
      log_date_format: 'YYYY-MM-DD HH:mm:ss Z',
      error_file: '/var/log/pm2/myapp-error.log',
      out_file: '/var/log/pm2/myapp-out.log',
      merge_logs: true,                // Merge cluster worker logs into one file

      // === GRACEFUL SHUTDOWN ===
      kill_timeout: 5000,             // Give the app 5s to finish in-flight requests
      listen_timeout: 8000,           // Max time to wait for app to signal "ready"
      wait_ready: false               // Set true if you use process.send('ready')
    }
  ]
};Start & Persist
# Create the log directory
sudo mkdir -p /var/log/pm2
sudo chown deploy:deploy /var/log/pm2

# Start the application
cd /var/www/myapp
pm2 start ecosystem.config.js

# Verify it's running
pm2 status

# Expected output:
# ┌─────┬──────────┬─────────────┬──────┬───────────┬──────────┬──────────┐
# │ id  │ name     │ mode        │ ↺    │ status    │ cpu      │ memory   │
# ├─────┼──────────┼─────────────┼──────┼───────────┼──────────┼──────────┤
# │ 0   │ myapp    │ cluster     │ 0    │ online    │ 0%       │ 58.0mb   │
# │ 1   │ myapp    │ cluster     │ 0    │ online    │ 0%       │ 56.2mb   │
# │ 2   │ myapp    │ cluster     │ 0    │ online    │ 0%       │ 55.8mb   │
# │ 3   │ myapp    │ cluster     │ 0    │ online    │ 0%       │ 57.1mb   │
# └─────┴──────────┴─────────────┴──────┴───────────┴──────────┴──────────┘

# CRITICAL: Save the process list so PM2 auto-starts on server reboot
pm2 save

# Generate the startup script (run the command it outputs)
pm2 startup

# PM2 will print a command like:
# sudo env PATH=$PATH:/usr/bin pm2 startup systemd -u deploy --hp /home/deploy
# COPY AND RUN that exact command
Essential PM2 Commands
| Command | Purpose |
|---|---|
pm2 status | Show all running processes |
pm2 logs myapp | Stream real-time logs (Ctrl+C to exit) |
pm2 logs myapp --lines 200 | Show last 200 log lines |
pm2 monit | Interactive dashboard (CPU, memory, logs) |
pm2 reload myapp | Zero-downtime restart (graceful reload) |
pm2 restart myapp | Hard restart (causes brief downtime) |
pm2 stop myapp | Stop the application |
pm2 delete myapp | Remove from PM2's process list |
6. Nginx — Reverse Proxy Configuration
Install Nginx
sudo apt install -y nginx

# Verify it's running
sudo systemctl status nginx
# You should see "active (running)"
Create the Site Configuration
# Remove the default Nginx page
sudo rm /etc/nginx/sites-enabled/default

# Create your app's config file
sudo nano /etc/nginx/sites-available/myapp
Paste this production-grade Nginx configuration:
# /etc/nginx/sites-available/myapp

# Rate limiting zone — prevents abuse (10 requests/second per IP)
limit_req_zone $binary_remote_addr zone=app_limit:10m rate=10r/s;

# Upstream block — points to your Node.js cluster
upstream nodejs_backend {
    server 127.0.0.1:3000;

    # Keep connections alive between Nginx and Node.js
    keepalive 64;
}

server {
    listen 80;
    listen [::]:80;
    server_name yourdomain.com www.yourdomain.com;

    # === SECURITY HEADERS ===
    add_header X-Frame-Options "SAMEORIGIN" always;
    add_header X-Content-Type-Options "nosniff" always;
    add_header X-XSS-Protection "1; mode=block" always;
    add_header Referrer-Policy "strict-origin-when-cross-origin" always;

    # === LOGGING ===
    access_log /var/log/nginx/myapp-access.log;
    error_log  /var/log/nginx/myapp-error.log;

    # === STATIC FILES (served directly by Nginx — much faster) ===
    location /public/ {
        alias /var/www/myapp/public/;
        expires 30d;
        add_header Cache-Control "public, immutable";
        access_log off;
    }

    # === MAIN APPLICATION ===
    location / {
        # Rate limiting — burst allows 20 queued requests
        limit_req zone=app_limit burst=20 nodelay;

        proxy_pass http://nodejs_backend;

        # Required proxy headers
        proxy_http_version 1.1;
        proxy_set_header Upgrade $http_upgrade;
        proxy_set_header Connection 'upgrade';
        proxy_set_header Host $host;
        proxy_set_header X-Real-IP $remote_addr;
        proxy_set_header X-Forwarded-For $proxy_add_x_forwarded_for;
        proxy_set_header X-Forwarded-Proto $scheme;

        # Timeouts
        proxy_connect_timeout 60s;
        proxy_send_timeout 60s;
        proxy_read_timeout 60s;

        # Buffering — protects Node.js from slow clients
        proxy_buffering on;
        proxy_buffer_size 128k;
        proxy_buffers 4 256k;
        proxy_busy_buffers_size 256k;

        # Don't cache dynamic responses
        proxy_cache_bypass $http_upgrade;
    }

    # === GZIP COMPRESSION ===
    gzip on;
    gzip_vary on;
    gzip_proxied any;
    gzip_comp_level 5;
    gzip_min_length 256;
    gzip_types
        text/plain
        text/css
        text/javascript
        application/javascript
        application/json
        application/xml
        image/svg+xml;

    # === FILE UPLOAD LIMIT ===
    client_max_body_size 10M;
}
Enable & Test
# Enable the site by creating a symlink
sudo ln -s /etc/nginx/sites-available/myapp /etc/nginx/sites-enabled/

# TEST the configuration for syntax errors (ALWAYS do this before reloading)
sudo nginx -t

# Expected output:
# nginx: the configuration file /etc/nginx/nginx.conf syntax is ok
# nginx: configuration file /etc/nginx/nginx.conf test is successful

# Only if the test passes — reload Nginx
sudo systemctl reload nginxnginx -t before reloading. A single syntax error in the config file will cause nginx reload to fail silently and your previous config stays active. In the worst case, a nginx restart with a broken config will take your entire site offline. The -t flag catches this before it happens.
At this point, if your DNS is pointed to your VPS IP, visiting http://yourdomain.com should show your Node.js application. Now let's secure it with HTTPS.
7. SSL/HTTPS with Let's Encrypt
# Install Certbot and the Nginx plugin
sudo apt install -y certbot python3-certbot-nginx

# Obtain and install the SSL certificate
# Certbot will automatically modify your Nginx config to use HTTPS
sudo certbot --nginx -d yourdomain.com -d www.yourdomain.com

# Follow the prompts:
# - Enter your email
# - Agree to terms
# - Choose "Redirect HTTP to HTTPS" when asked (recommended)
Certbot automatically:
- Obtains a free SSL certificate from Let's Encrypt
- Modifies your Nginx config to listen on port 443 with SSL
- Adds a redirect from HTTP (port 80) to HTTPS (port 443)
- Sets up a systemd timer to auto-renew the certificate every 90 days
# Verify the auto-renewal timer is active
sudo systemctl status certbot.timer

# You can also test renewal manually (dry run — doesn't actually renew)
sudo certbot renew --dry-run
8. Handling Graceful Shutdown in Your App
This is the step that 99% of deployment guides skip, and it's the difference between amateur and production-grade. When PM2 reloads your app (during a deployment), it sends a SIGINT signal. Your app must handle this to finish processing in-flight requests before exiting.
// Add this to your app.js / server.js entry point

const server = app.listen(PORT, () => {
  console.log(`Server running on port ${PORT}`);
});

// === GRACEFUL SHUTDOWN ===
// When PM2 sends SIGINT (during reload/restart), finish in-flight requests
process.on('SIGINT', () => {
  console.log('SIGINT received. Shutting down gracefully...');
  server.close(() => {
    console.log('All connections closed. Exiting.');
    // Close database connections
    mongoose.connection.close(false, () => {
      process.exit(0);
    });
  });

  // Force exit if graceful shutdown takes too long
  setTimeout(() => {
    console.error('Forced shutdown — connections did not close in time.');
    process.exit(1);
  }, 10000);  // 10 second timeout
});
9. The Deployment Script (Zero-Downtime Updates)
Every time I push an update to production, I run this script. It pulls the latest code, installs dependencies, and does a graceful PM2 reload — zero downtime.
#!/bin/bash
# /var/www/myapp/deploy.sh — Run this on the server to deploy updates

set -e  # Exit immediately if any command fails

APP_DIR="/var/www/myapp"
BRANCH="main"

echo "========================================="
echo "  Deploying to production..."
echo "========================================="

cd $APP_DIR

# 1. Pull latest code
echo "[1/4] Pulling latest code from $BRANCH..."
git pull origin $BRANCH

# 2. Install production dependencies
echo "[2/4] Installing dependencies..."
npm ci --omit=dev

# 3. Run database migrations (if applicable)
# echo "[3/4] Running migrations..."
# npx prisma migrate deploy   # Uncomment if using Prisma
# npm run migrate              # Uncomment if using custom migrations

# 4. Graceful reload — zero downtime
echo "[4/4] Reloading PM2 (zero-downtime)..."
pm2 reload ecosystem.config.js

echo "========================================="
echo "  Deployment complete!"
echo "  Run 'pm2 logs myapp --lines 50' to verify"
echo "========================================="
# Make the script executable
chmod +x /var/www/myapp/deploy.sh
# To deploy, simply run:
./deploy.shpm2 reload instead of pm2 restart? The restart command kills all workers simultaneously, causing a brief period where no process is listening — users get connection errors. The reload command starts new workers first, then gracefully kills old ones only after the new workers are ready. Zero dropped requests.
10. Monitoring & Log Management
# Real-time monitoring dashboard
pm2 monit

# Stream application logs
pm2 logs myapp

# Check Nginx access logs for traffic patterns
sudo tail -f /var/log/nginx/myapp-access.log

# Check Nginx error logs for proxy issues
sudo tail -f /var/log/nginx/myapp-error.log

# Check server resource usage
htop         # Interactive process viewer
df -h        # Disk space
free -m      # Memory usage
Set Up Log Rotation (Prevent Disk from Filling Up)
# Install PM2 log rotation module
pm2 install pm2-logrotate

# Configure: keep 30 days of logs, max 50MB per file
pm2 set pm2-logrotate:max_size 50M
pm2 set pm2-logrotate:retain 30
pm2 set pm2-logrotate:compress true
11. Common Mistakes That Will Break Your Production Server
I've made (or seen) every one of these mistakes. Here's how to avoid them:
| Mistake | Why It's Dangerous | The Fix |
|---|---|---|
| Running as root | Any app vulnerability = full server compromise | Create a deploy user, run Node.js under that user |
| Exposing port 3000 in the firewall | Bypasses Nginx — no SSL, no rate limiting, no security headers | Only open ports 22, 80, 443 in UFW |
Using node app.js directly |
One crash = site is down until you manually restart | Always use PM2 with cluster mode |
Forgetting pm2 save |
Server reboot = all PM2 processes are gone | Always run pm2 save after any process change |
Using npm install in production |
Can install different versions than development, causing bugs | Use npm ci --omit=dev for deterministic installs |
Not handling SIGINT |
PM2 reload kills connections mid-request, users see errors | Add graceful shutdown handler in your app |
Committing .env to Git |
Your database passwords and API keys are exposed publicly | Add .env to .gitignore, create it manually on server |
| Not testing Nginx config before reload | Broken config = site goes offline on reload/restart | Always run sudo nginx -t before sudo systemctl reload nginx |
12. Production Deployment Checklist
Before you consider your deployment "production-ready," verify every item on this checklist:
- ☐ Non-root user — App runs under a dedicated
deployuser - ☐ Firewall enabled — Only SSH, HTTP, HTTPS open (
ufw status) - ☐ Node.js LTS — Installed via NodeSource, not apt default
- ☐ PM2 cluster mode — Using all CPU cores (
pm2 statusshows multiple workers) - ☐ PM2 startup — Process auto-starts on server reboot (
pm2 startup+pm2 save) - ☐ Nginx reverse proxy — Port 3000 is NOT exposed, only 80/443
- ☐ Security headers — X-Frame-Options, X-Content-Type-Options set in Nginx
- ☐ SSL/HTTPS — Let's Encrypt certificate installed, HTTP redirects to HTTPS
- ☐ SSL auto-renewal —
certbot renew --dry-runsucceeds - ☐ Gzip compression — Enabled in Nginx for text/JS/CSS/JSON
- ☐ Rate limiting — Configured in Nginx to prevent abuse
- ☐ Graceful shutdown — App handles SIGINT and closes connections cleanly
- ☐ Log rotation — pm2-logrotate installed, logs won't fill disk
- ☐ Environment variables —
NODE_ENV=production, secrets not in Git - ☐ Deploy script — Automated pull → install → reload workflow
Frequently Asked Questions
Can I run multiple Node.js apps on the same VPS?
Yes. Run each app on a different port (3000, 3001, 3002) with separate PM2 processes and ecosystem configs. Create separate Nginx server blocks for each domain, each proxying to the correct port.
How much traffic can this setup handle?
On a 4-core / 4GB VPS with PM2 cluster mode, this setup can comfortably handle 1,000–5,000+ concurrent connections depending on your app's complexity. Nginx alone can handle 10,000+ concurrent connections. The bottleneck is usually your database, not Node.js or Nginx.
Should I use Docker instead?
For a single application on one server, this direct deployment is simpler, faster, and uses fewer resources than Docker. Docker adds value when you need reproducible environments across multiple servers, microservices orchestration, or CI/CD pipeline consistency. Start without Docker — migrate to it when the complexity justifies it.
What VPS provider do you recommend?
I've used DigitalOcean, Hetzner, and AWS Lightsail. Hetzner offers the best price-to-performance ratio. DigitalOcean has the best documentation and developer experience. For production workloads where you need the absolute cheapest option with great performance, go with Hetzner.
Conclusion
You now have a production-grade Node.js deployment that matches what real companies use. Not a Heroku hobby project, not a Docker-compose tutorial that falls apart under load — a battle-tested, single-server deployment with proper security, process management, and zero-downtime updates.
The architecture is simple by design: Nginx → PM2 → Node.js. It has powered countless production applications at scale, and it's the exact setup I rely on for the systems I manage.
I'm always looking to improve these guides. If you have any feedback, corrections, or just want to discuss Node.js deployments, please reach out to me here.